Evidence
Evidence management and overview
The Evidence page is the single list of every file uploaded to Tidal, whether it was attached to a task, a policy, or a control. This article covers finding files in it, uploading new ones, and why some files cannot be deleted.
Evidence page overview
The Evidence page gives you a central overview of all files uploaded to Tidal Control. These files are used as evidence for tasks, policy documentation for controls, and general compliance documentation.
Where to find it: This overview now lives under Settings → Evidence. It was previously a top-level "Documents" page; the functionality is unchanged, only the location and name have moved.
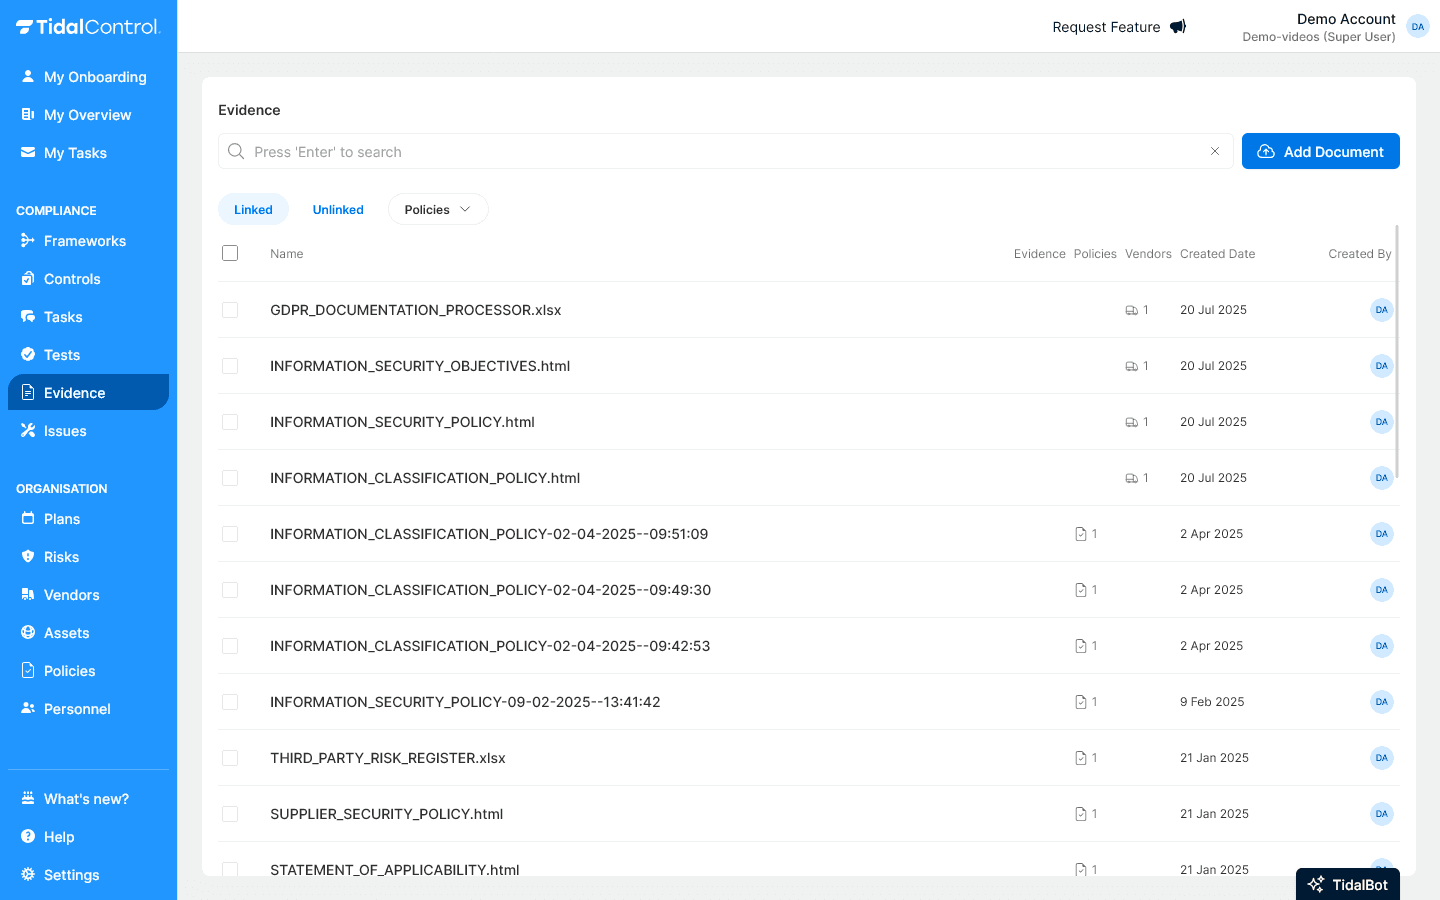
What you see in the overview
Each row shows the filename, when it was uploaded, and two icons counting how often it's actually in use.
Per document is shown:
- Name - Original name of uploaded file
- Created Date - When the document was added
- Usage indication - Two icons with numbers showing:
- Paperclip icon (Evidence) - How often used as evidence in Tasks
- Controls icon - How often used as documentation in Controls
- Created By - Who added the document
Filtering and searching documents
The usage filters are the useful ones here: they separate files that are being used as evidence from files that are not attached to anything.
Document usage filters
Filter for unused files to find candidates for cleanup, since an orphaned upload can usually be deleted safely.
Filter by usage status:
- Linked - Documents linked to Tasks as evidence
- Unlinked - Uploaded documents not yet used anywhere
Clean up orphaned documents: Use the "Unlinked" filter regularly to identify unused files. These can often be safely deleted to keep your document library organized.
Searching in documents
Search matches filenames, and combining it with a usage filter narrows results further.
Search functionality:
- Click in the search field at the top of the page
- Type filename or part of the name
- Results filter automatically while typing
- Combine with usage filters for specific searches
Search tips:
- Search by date - for example "2025" for all documents from this year
- Search by type - for example "policy" for policy documents
- Search by subject - for example "security" for security-related files
Sorting documents
Sort the list by name, date, or size to find a specific upload.
Sort options
Sort the list by upload date, filename, or the person who uploaded it.
Available sorting methods:
- Newest - Most recently uploaded documents first
- Oldest - Oldest documents first
- Name (A-Z) - Alphabetical by filename
- Name (Z-A) - Reverse alphabetical
- Author (A-Z) - Alphabetical by uploader name
- Author (Z-A) - Reverse by uploader
Adding new documents
Files can be uploaded in bulk, which is the fastest way to populate your policies.
Uploading documents
- Click "Add Document" in top right (blue button)
- Select file(s) from your computer
- Files are uploaded and appear in overview
- Status is "Unlinked" until you link them to tasks or controls
Best practices for uploading
- Batch upload - It's possible to upload multiple documents at once. This is especially applicable for setting up Policies.
- Link to tasks - Go to the Tasks page and Upload files there
- Link to Policies - Go to the Policies page and Upload files there
Using and linking documents
Files are attached from the item that needs them, not from the Evidence page itself. To use a file as evidence for a task, go to the Tasks page and upload it there. To attach one to a policy, go to the Policies page and upload it there. Either way the file then appears in this overview, with an icon showing what it is used for.
Managing and maintaining documents
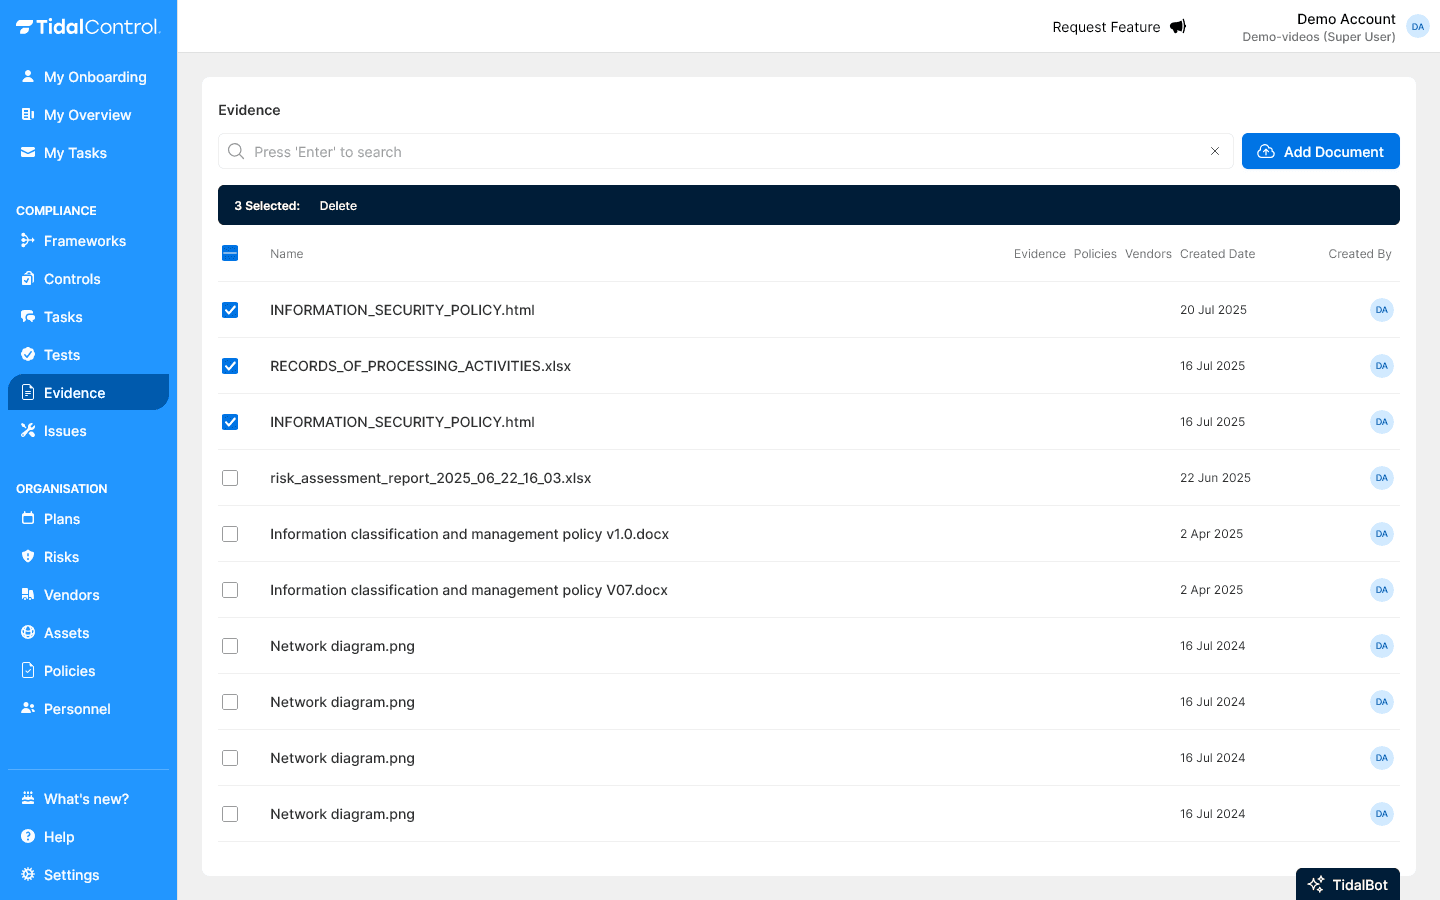
Select files with the checkboxes to act on several at once. Only files that are not linked to anything can be deleted.
Selecting documents
-
Click checkboxes to the left of documents you want to manage
-
Select multiple by checking different checkboxes
-
Bulk actions become available at the top of the list
Deleting documents
To maintain audit trail integrity, only orphaned documents (not linked to tasks, policies, or vendor documentation) can be deleted.
Deletion steps:
- Select document(s) with checkboxes
- Click "Delete" button (red, top right)
- Confirm deletion in dialog
- Documents are permanently deleted
When safe to delete:
- Unlinked documents without links
- Old versions of updated policy documents
- Test uploads not intended for production
- Duplicates of existing documents
Be careful with deletion: Always check that documents are not being used as evidence or policy before deleting them. Deleted documents cannot be recovered.
Next steps
Now that you know how to manage documents in Tidal Control:
- Upload systematically relevant policy documents and procedures
- Link directly to tasks and policies for maximum traceability
- Maintain regularly your document library for optimal organisation
- Monitor usage to identify important and unused documents
For problems and frequently asked questions, see Troubleshooting & FAQ.
- Previous
- Troubleshooting & FAQ