Policies
Getting started with Policies
Policies knows which policies your frameworks require. The overview lists the ones you have started; the ones you have not are behind the Add policy button. Starting one gives you four routes: open the Tidal template for that policy, write it in the built-in editor, upload an existing file, or link to one held elsewhere.
Policies overview and filters
When you open Policies, you'll see the policies you have started, with the progress cards above them counting everything your frameworks require:
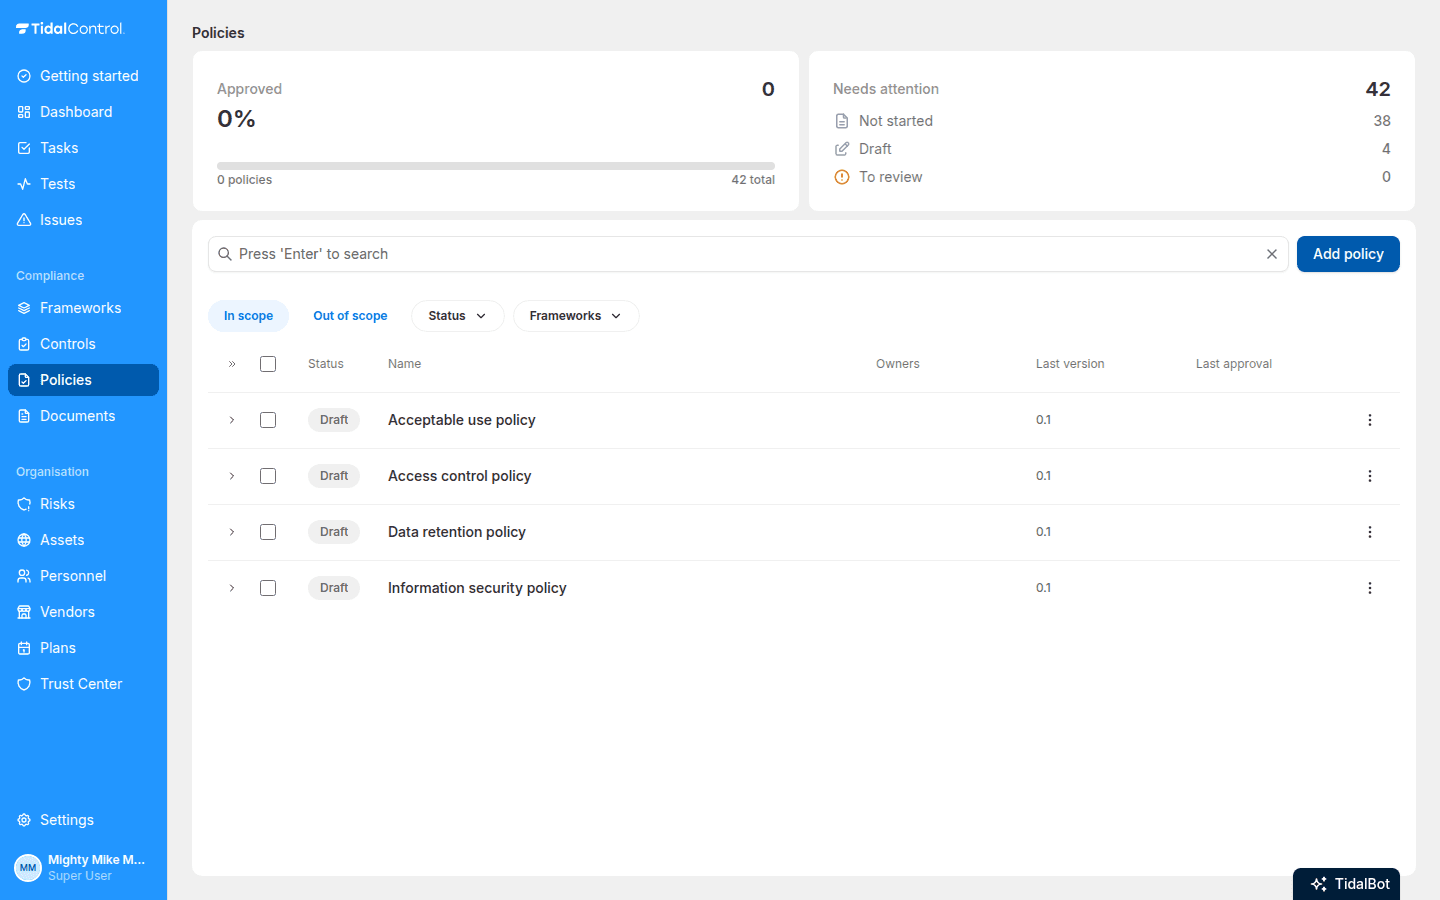
The list is what exists. A policy you have not started yet has no row, and the "Not started" number in the Needs attention card is how you see how many are left. Add policy is where you start one.
Every policy that ships a Tidal template offers it as a starting point, on every plan. A free trial can start three of them; the rest are still listed, marked as needing an upgrade.
Read more in Writing and editing policies.
Do you see an empty screen or are policies missing? Do you see them in the 'Out of scope' tab?
Then these policies are not yet linked to controls in your environment. See "In scope vs Out of scope" below for how to bring them in scope.
For each policy you see:
Policy fields
- Status (Draft, Approved, To Review)
- Name
- Owners (if already assigned)
- Last version
- Last approval (if applicable)
- Actions (the row menu, for renaming, resetting and the rest)
Status meanings
- Draft: Document available but not yet approved
- Approved: Approved document within the last 12 months
- To Review: No recent approval (older than 12 months)
Search and filter
- In scope / Out of scope tabs - Switch between policies that count towards compliance and policies that don't
- Search bar - Type policy names or Tidal IDs to find specific policies
- Status filter - Filter on Draft, Approved, or To Review
- Framework filter - Show only policies required by a specific framework
Use the status filter to work efficiently: filter on "Draft" to find policies ready for approval, or on "To Review" to catch up on overdue reviews.
In scope vs Out of scope
Scope decides which policies count. A policy is in scope when a control asks for it, and out of scope when no control does — the same rule that governs tests.
What determines scope
Every policy and required document has its own policy test in Tidal, named after the policy (for example "Acceptable use policy"). That test decides the scope:
In scope policies:
- Policy test is linked to at least one control in your ISMS
- Count towards framework progress and compliance scoring
- Shown by default when you open Policies or Documents
Out of scope policies:
- Policy test is linked to no control at all
- No effect on your scores - the policy isn't required in your environment
- Only visible under the "Out of scope" tab
A policy test is an ordinary Tidal test, so it follows the ordinary scope rule: linked to a control means in scope.
Read more about this in Getting started with Tests.
Bringing a policy in scope
- Open Policies (or Documents) and click the "Out of scope" tab
- Find the policy you want to add and note its name
- Go to Controls and open the control that should require this policy
- Go to the "Tests" tab of the control
- Select the text field and search for the policy name - policy tests sit under the "Tidal Control" group
- Choose the test - the link saves automatically
- Return to Policies - the policy now sits under "In scope" and can be started
Not sure which control belongs to a policy? Filter your controls on the relevant framework and pick the control whose requirement the policy describes. A policy may be linked to several controls; one link is enough to make it in scope.
Taking a policy out of scope
- Go to Controls and open the control its policy test is linked to
- Go to the "Tests" tab and click the X on the chip of the policy test
- Repeat for every control the policy test is linked to - as long as one link survives, the policy stays in scope
- The policy moves to the "Out of scope" tab and stops counting towards your scoring
Taking a policy out of scope deletes nothing. Drafts, approved versions and version history all survive, and reappear the moment you bring the policy back in scope.
For the steps on the control side, see Editing and managing controls.
Policies and Documents
Required documentation is split over two menu items:
- Policies - Directive documents you establish and approve, such as an access control policy or an acceptable use policy
- Documents - Required documents, such as an internal audit report, an organisation chart, or your information security objectives
The screens are the same: same overview, same statuses, same editor, same three routes for filling a document, and the same In scope / Out of scope mechanism described above.
What differs is what accumulates over time. A policy is one document you maintain, so approving it produces versions of the same thing. A required document is a recurring obligation, so each cycle adds a separate document — the 2026 audit report sits alongside the 2025 one rather than replacing it.
Read more about that difference, and how to file each cycle, in Getting started with Required Documents.
Looking for uploaded files you attach to tasks as evidence? Those live under Settings → Evidence, not on the Documents page.
Read more about this in Evidence management and overview.
Starting your first policy
Click Add policy. Tidal asks which policy you want to start, listing everything your frameworks require that you have not started yet, with the controls each one satisfies:
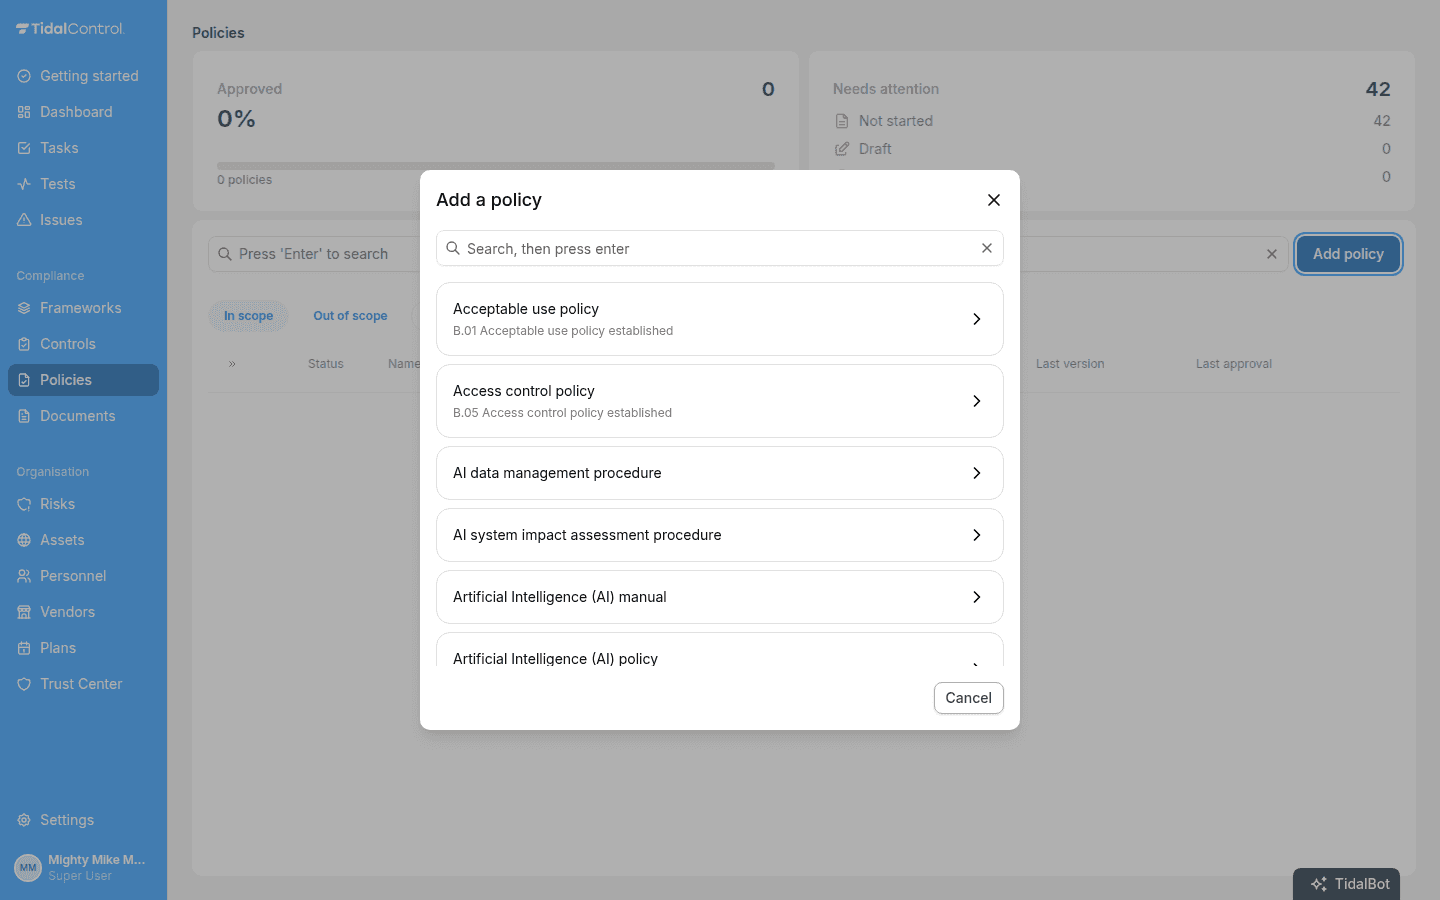
Search by name if the list is long. Once you pick one, Tidal asks how you want to fill it.
Choice menu
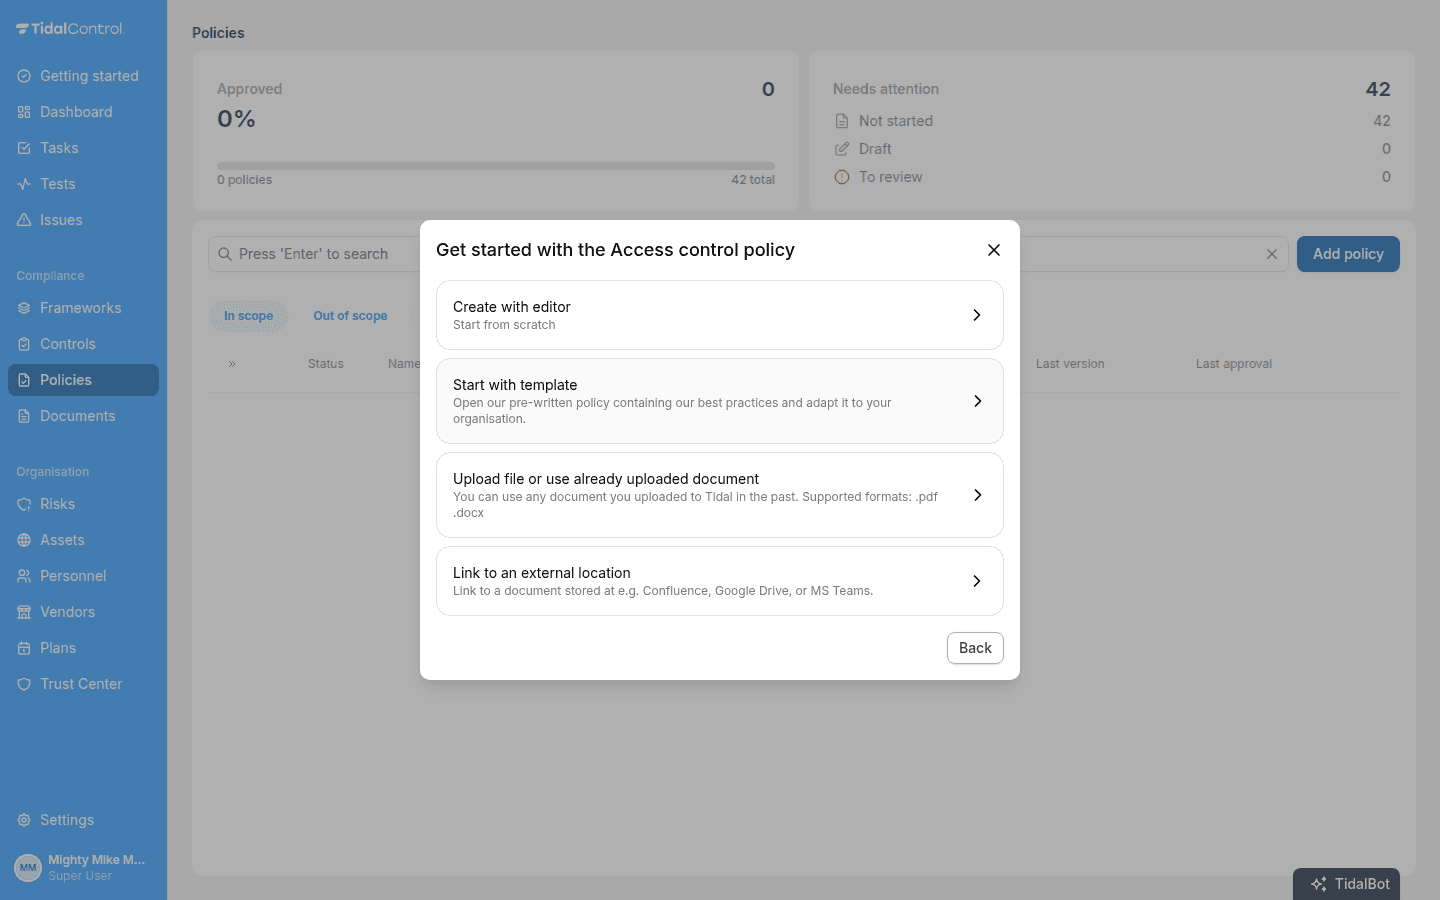
1. Create with editor
- Create policies from scratch with our built-in editor
- Full word processing capabilities
- Automatic version control
- Integrated approval and review flow
We recommend new users start with the Policy Editor. This offers the most functionality and is easiest to get started with. You can always switch to another method later.
2. Start with template
- Opens the Tidal template for this policy, already written
- Adapt it to your organisation instead of starting from a blank page
- Same editor, same version control, same approval and review flow
- Not every policy has one, so the option appears only where a template exists
3. Upload file or use already uploaded document
- Upload PDF or Word documents
- Maintain your current documents and workflows
- Easy version replacement (each 'upload' is a new version)
- Integrated approval and review flow
4. Link to an external location
- Link policies that are managed externally
- Use URLs to your existing documentation management system
- Maintain overview without duplicating documents
- Integrated approval and review flow
Understanding policy types
The choice you make affects how you proceed with this policy. Below is a brief explanation of the main functionalities per policy type:
Internally managed policies
- Created and edited in Policies
- Full functionality available
- Automatic PDF generation with metadata
Uploaded documents
- Recognisable by paperclip icon
- Download/Upload capability
- Editing outside Tidal
- Each 'upload' is a new version
Externally managed policies
- URL-based
- Editing and version management outside Tidal
- Approvals and reviews possible in Tidal
With externally managed policies, you are responsible for version management yourself. Make sure your external system provides sufficient audit trails.
You can still use the approval and review flows within Tidal to demonstrate compliance.
- Previous
- Troubleshooting & FAQ