Vendors
Creating and managing vendors
A vendor record is built in a fixed order: create it, complete its assessment questionnaire, which produces a risk rating automatically, attach the supporting documents, and then approve it. It stays a Draft until you do.
Creating a new vendor
A vendor starts as a Draft and stays there until its assessment is complete.
Vendor addition process
- Click "Add vendor" top right in Vendors overview
- "Create a new Vendor" dialogue opens
- Search for a vendor or add - Type vendor name
- Assign owner - Select responsible person (optional)
- Description - Add description (optional, markdown supported)
- Click "Create" to create vendor
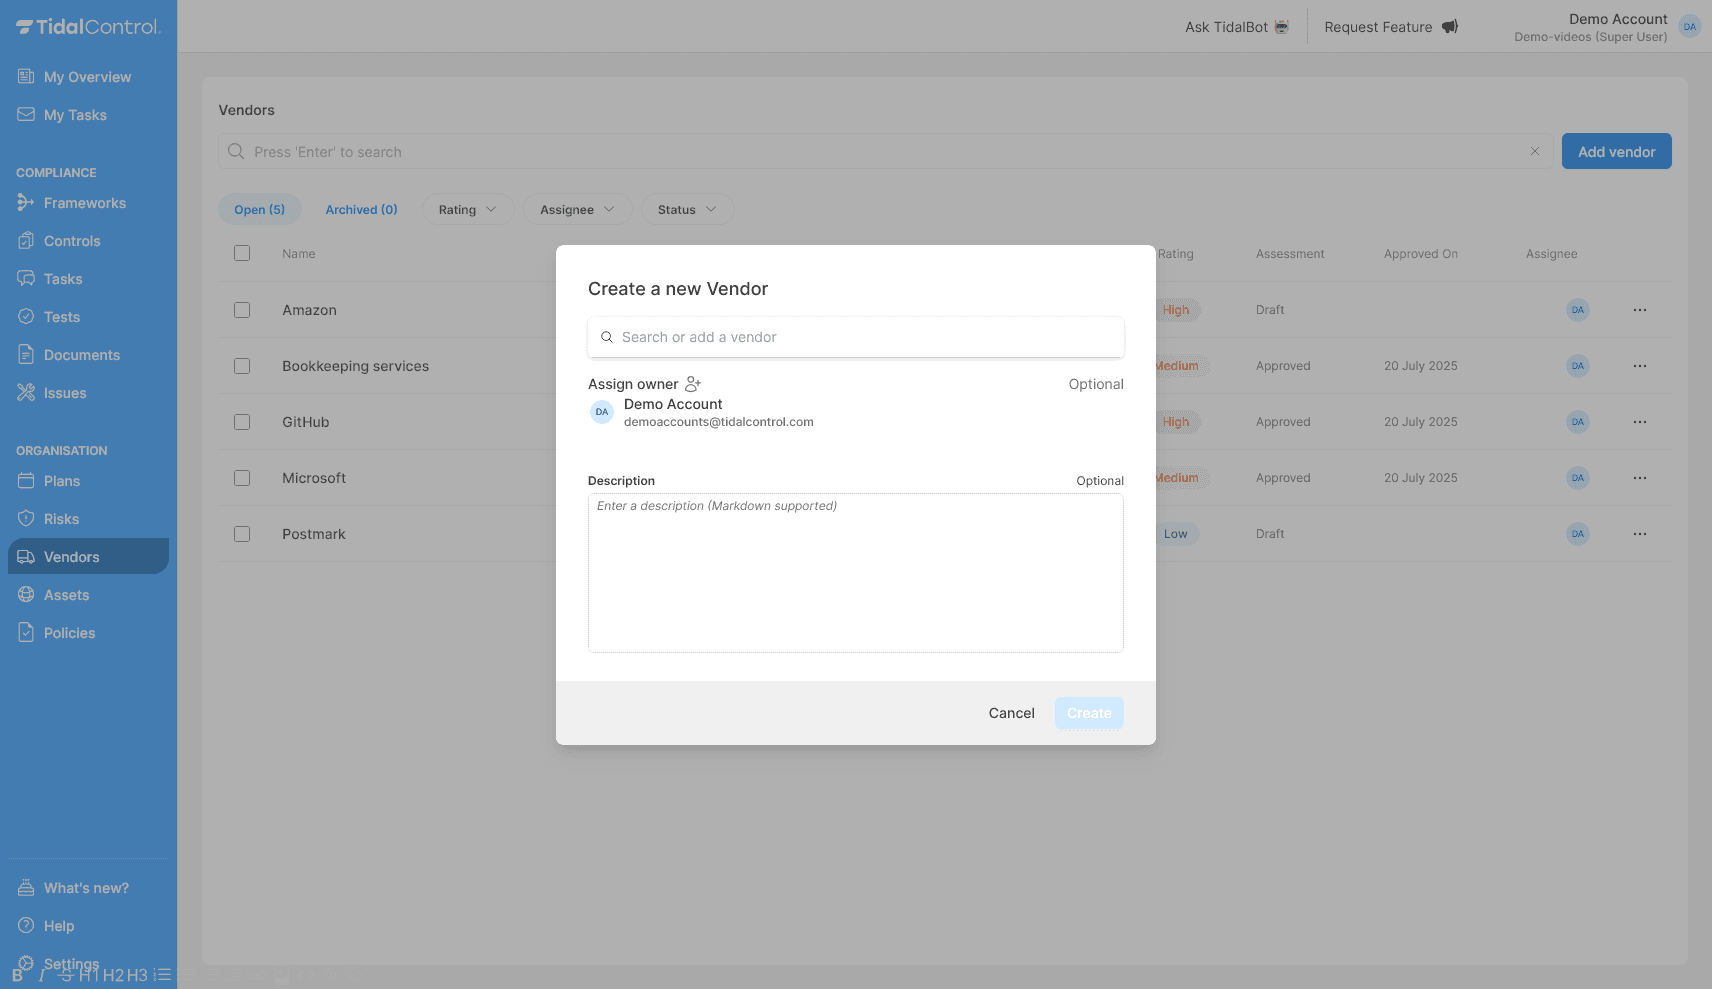
Initial vendor setup:
- Status: Automatically "Draft"
- Assessment: Empty, must be completed
- Rating: Determined after assessment completion
- Owner: Assigned person or to be assigned later
Completing vendor assessment
The assessment determines risk classification and compliance requirements for the vendor.
Completing assessment questionnaire
Go to Assessment tab of vendor detail panel and answer all questions:
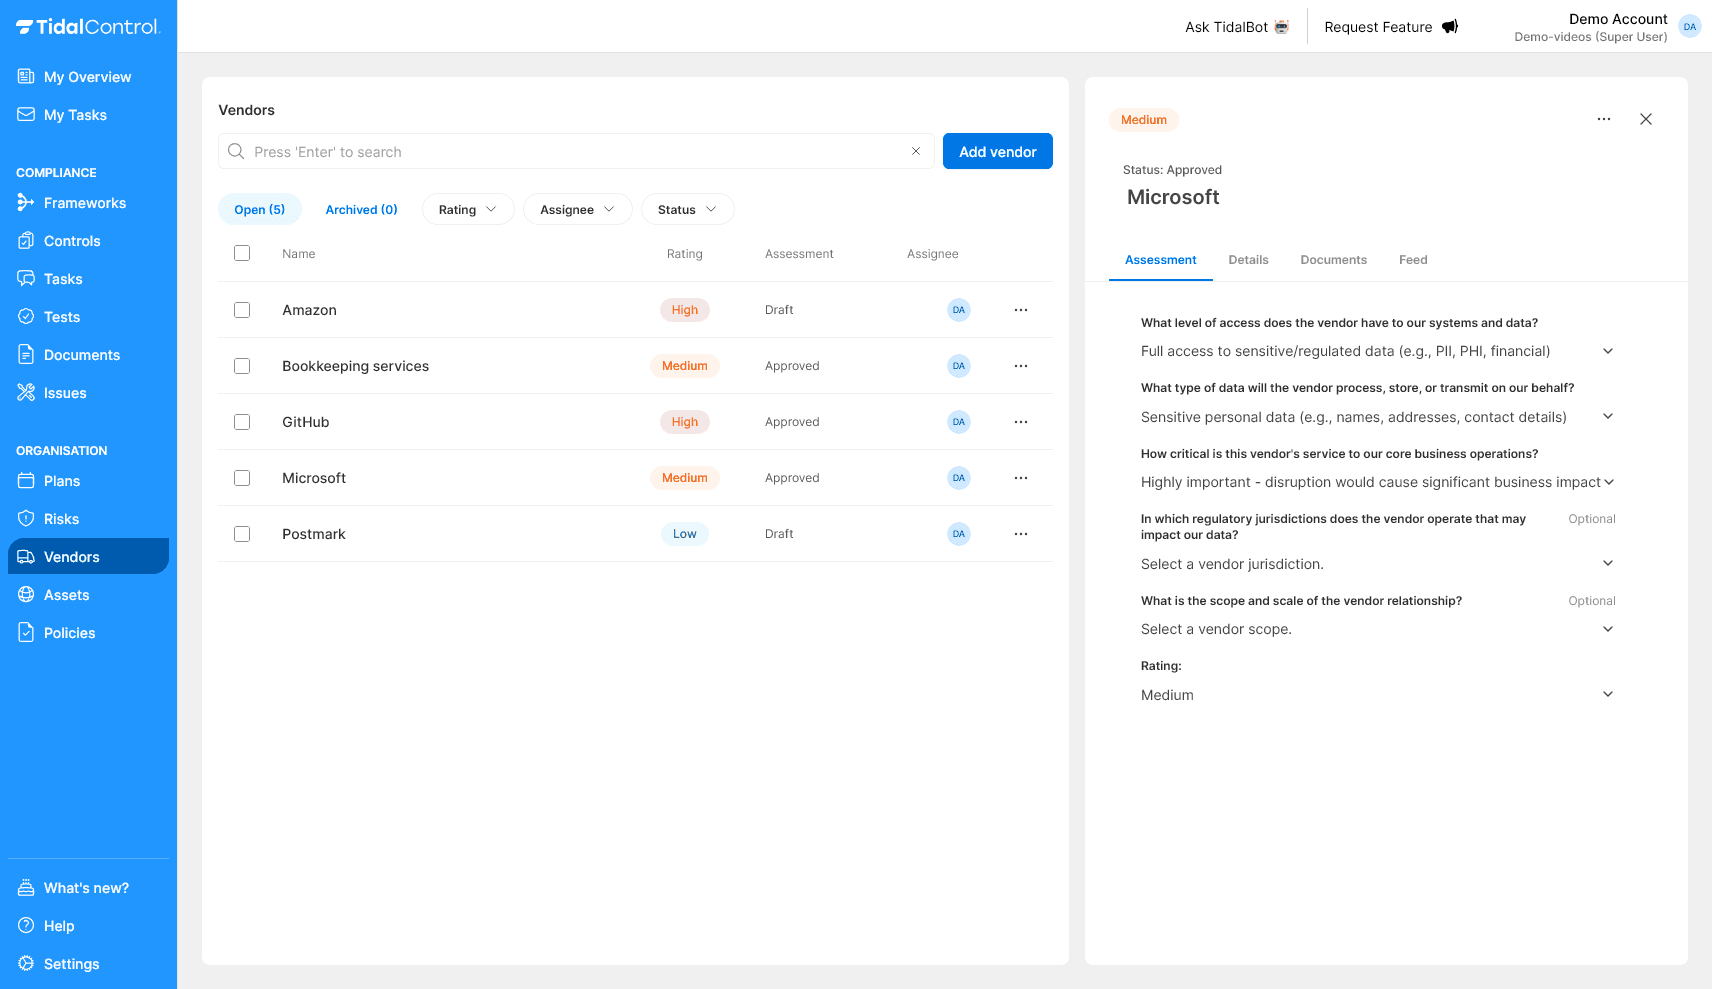
Data Access Level:
- No access - No access to systems or data
- Limited access - Limited access to non-sensitive data
- Full access to sensitive/regulated data - PII, financial, health data
Data Processing Type:
- No data processing - Physical services only
- Basic business data - Non-sensitive operational data
- Sensitive personal data - Names, addresses, contact details
- Regulated data - Financial, health, government data
Business Criticality:
- Low impact - Minimal business disruption if unavailable
- Moderate impact - Some operational impact
- Highly important - Significant business impact from disruption
- Business critical - Core operations dependent on service
Regulatory Jurisdictions (optional):
- Select relevant jurisdictions where vendor operates
- For example: EU/EEA, US, Asia-Pacific
- Influences compliance requirements
Vendor Scope (optional):
- Limited scope - Specific project or service
- Department level - Service for one department
- Organisation wide - Service for entire organisation
Automatic risk rating determination
After assessment completion, Tidal automatically calculates the risk rating:
- High: Critical business services, sensitive data and/or legal scope
- Medium: Moderate impact, limited data access and/or standard compliance
- Low: Minimal impact, no data processing and/or low-risk services
Configuring vendor details
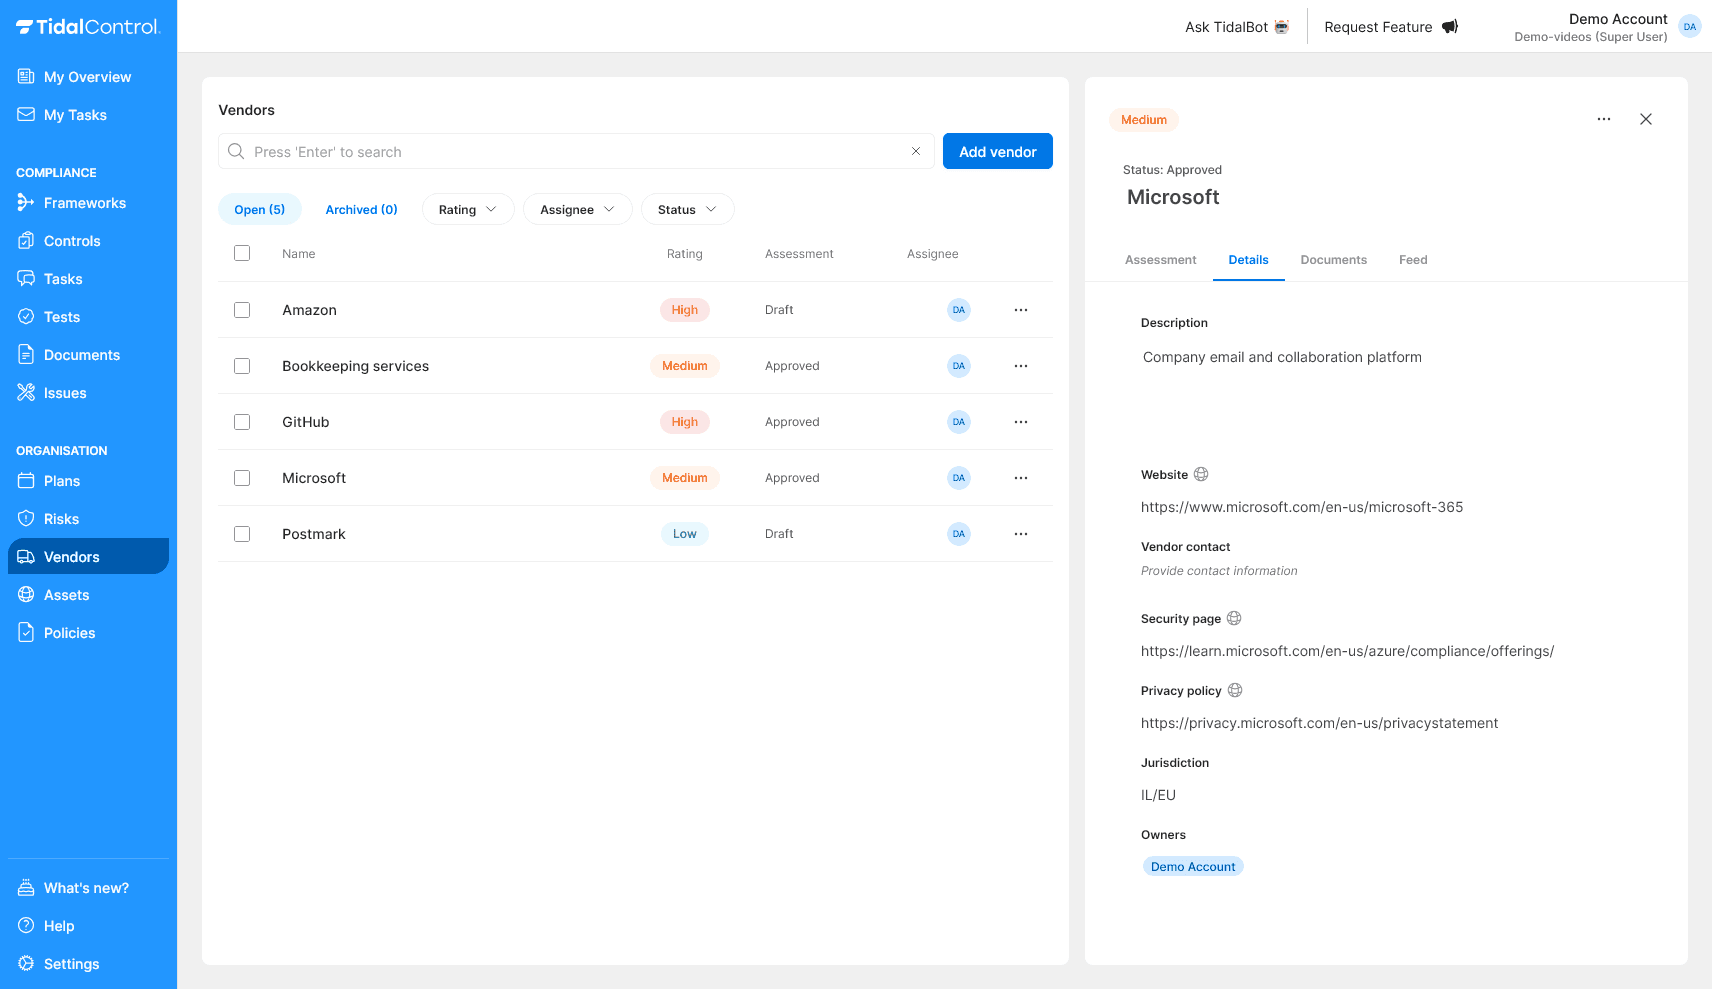
The Details tab holds the vendor's own information, separate from its assessment answers.
Completing Details tab
Nothing entered here affects the risk rating; that comes from the assessment itself.
Basic vendor information:
- Description: Description of vendor services
- Website: Official vendor website URL
- Vendor contact: Primary contact person on vendor side
Compliance and security information:
- Security page: Link to vendor security documentation
- Privacy policy: URL to vendor privacy policy
- Jurisdiction: Legal jurisdiction of vendor (e.g. UK/EU)
Internal management:
- Owners: Add internal owners of vendor relationship
Document management
Vendor documents are the evidence behind the assessment: certifications, reports, and agreements.
Document upload process
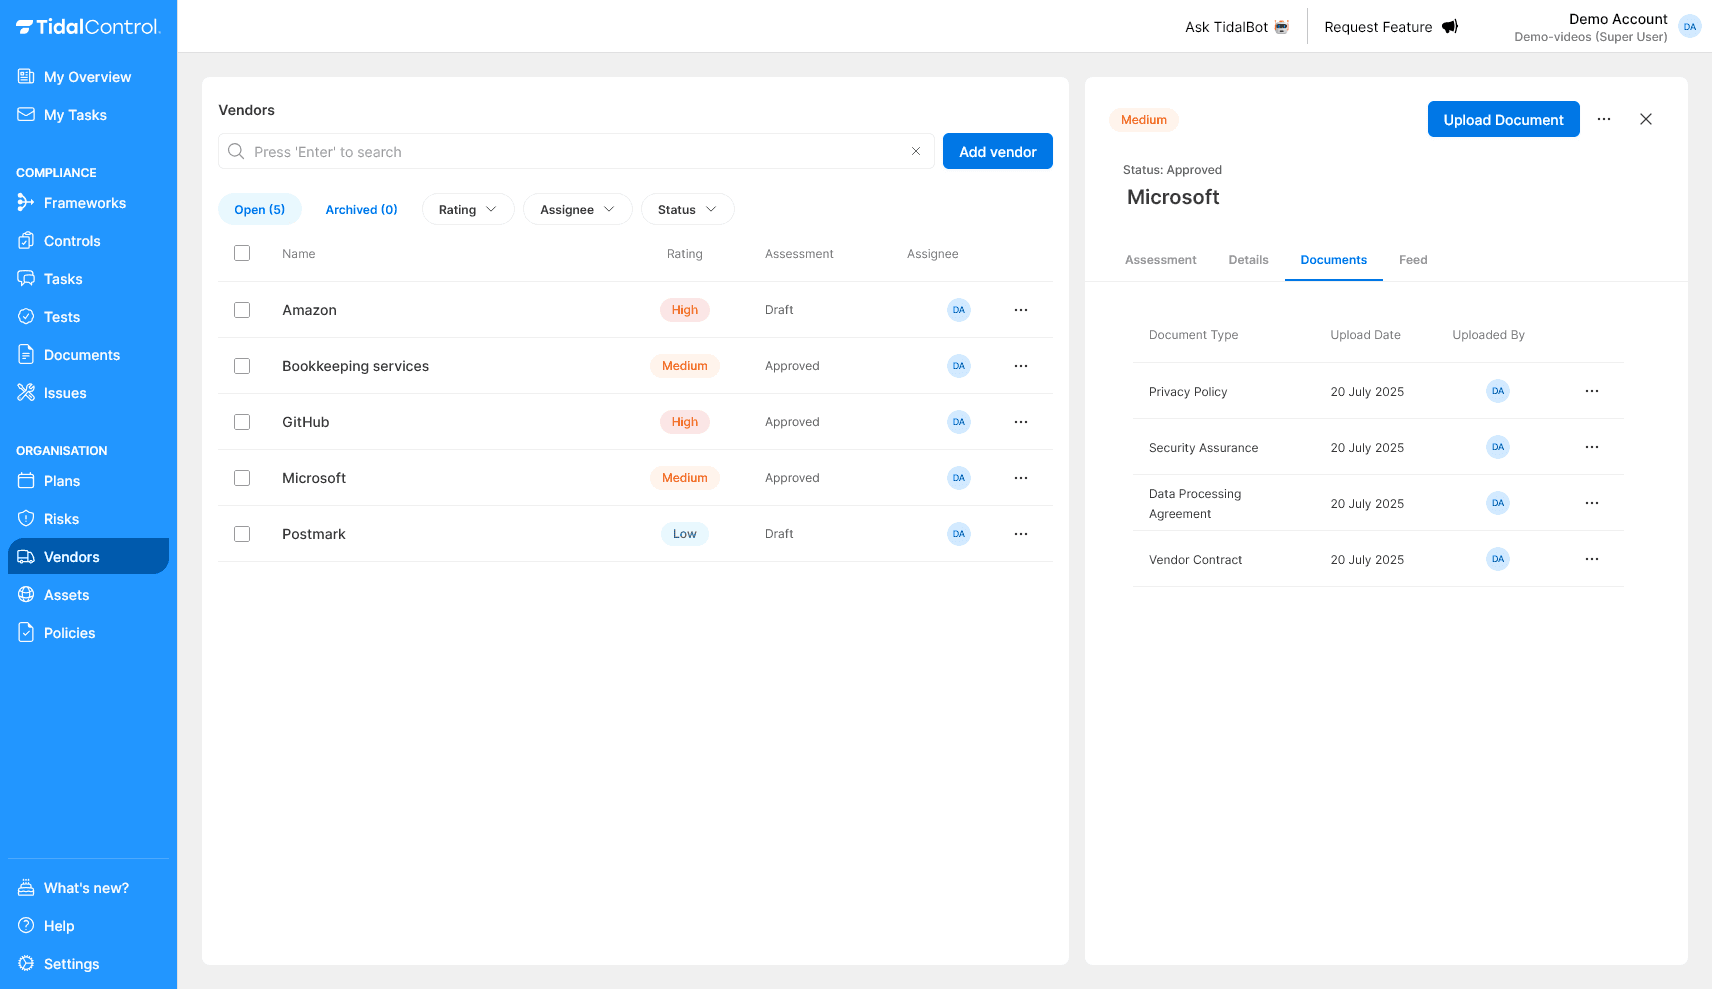
- Go to Documents tab in vendor detail panel
- Click "Upload Document"
- Document Type manually select
- Select document from computer
Document types
Which documents you need depends on the vendor's risk level, but a privacy policy and security assurance cover most cases.
Types of compliance documents:
- Privacy Policy - Vendor's privacy policy and personal data handling
- Security Assurance - Security certifications and reports (e.g. ISO 27001, SOC 2)
- Data Processing Agreement - GDPR/privacy compliant processor agreement
- Vendor Contract - Primary contract with vendor
Document tracking:
- Upload Date - When document was added
- Uploaded By - Who uploaded the document
- Document Type - Categorisation for compliance
Vendor approval workflow
Approving a vendor is a deliberate step after the assessment, and what you should require before approving depends on the risk rating.
Draft to Approved process
A vendor is ready to approve once its assessment, rating, and required documents are all in place.
Recommended approval requirements:
- Assessment completed - All mandatory questions answered
- Risk rating determined - Classification assigned
- Required documents uploaded per risk level
- Owner assigned - Responsible person assigned
Approving a vendor:
- Go to vendor actions menu (three dots)
- Select "Approve Vendor"
- Status changes to "Approved" and "Approved" date is automatically set
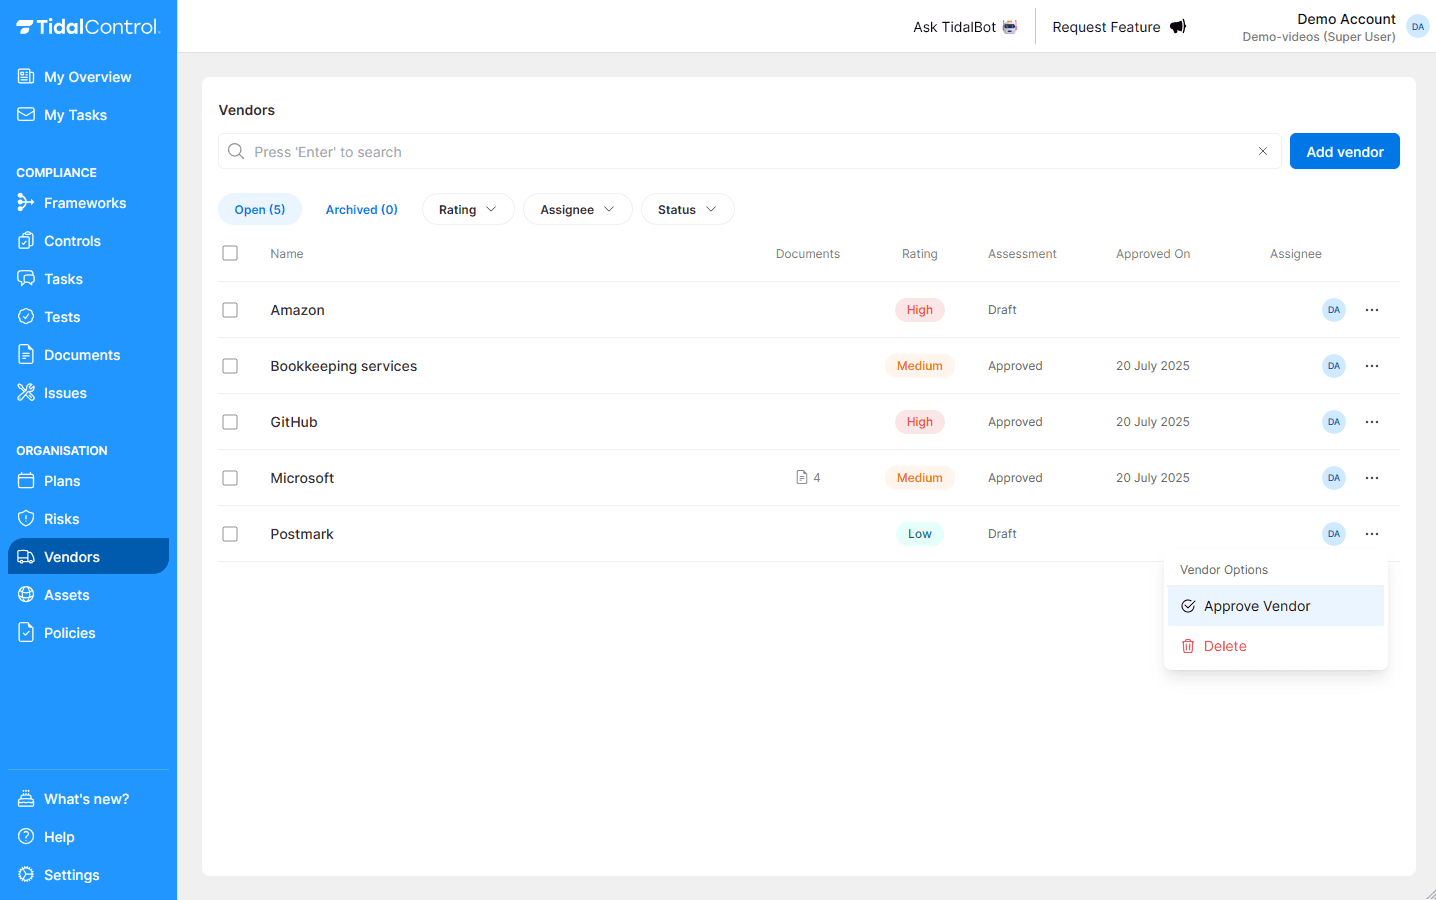
Recommended approval criteria per risk level
What you should require before approving scales with the risk rating: more evidence and more frequent reassessment for high-risk vendors.
High risk vendors:
- Risk assessment: All questions answered and deemed acceptable
- Documents - All documents uploaded and reviewed
- Quarterly or bi-annual reassessment
Medium risk vendors:
- Risk assessment: Mandatory questions answered and deemed acceptable
- Documents - At least contract and certification uploaded and reviewed
- Annual reassessment
Low risk vendors:
- Risk assessment: Mandatory questions answered and deemed acceptable
- Documents - At least contract uploaded and reviewed
- Annual or triennial reassessment
Managing multiple vendors simultaneously
Selecting several vendors at once lets you reassign, approve, archive, or delete them in a single action.
Available bulk operations:
- Change assignee - Assign new owner to group of vendors
- Archive - Archive multiple vendors at once
- Approve - Approve multiple vendors at once
- Delete - Remove multiple vendors from system at once
Bulk workflow:
- Select vendors with checkboxes on left in overview
- Relevant buttons appear at top of table
- Choose desired action and confirm
Next steps
Now you can create and manage vendors:
- Start with critical vendors for immediate risk assessment
- Develop document templates for efficient and consistent application of compliance requirements
- Plan periodic review cycles for vendor portfolio management
- Train vendor owners in assessment and approval procedures
- Previous
- Getting started with Vendors