Users
Creating and managing users
Creating a new user
Adding new team members to Tidal Control happens through a simple process where you can directly assign the appropriate role.
User addition steps
- Go to Settings → Users in the left navigation
- Click "Add User" button at the top right of the Users page
- Fill in user information in the creation form
- Select appropriate role for the new user
- Click "Create" to add user
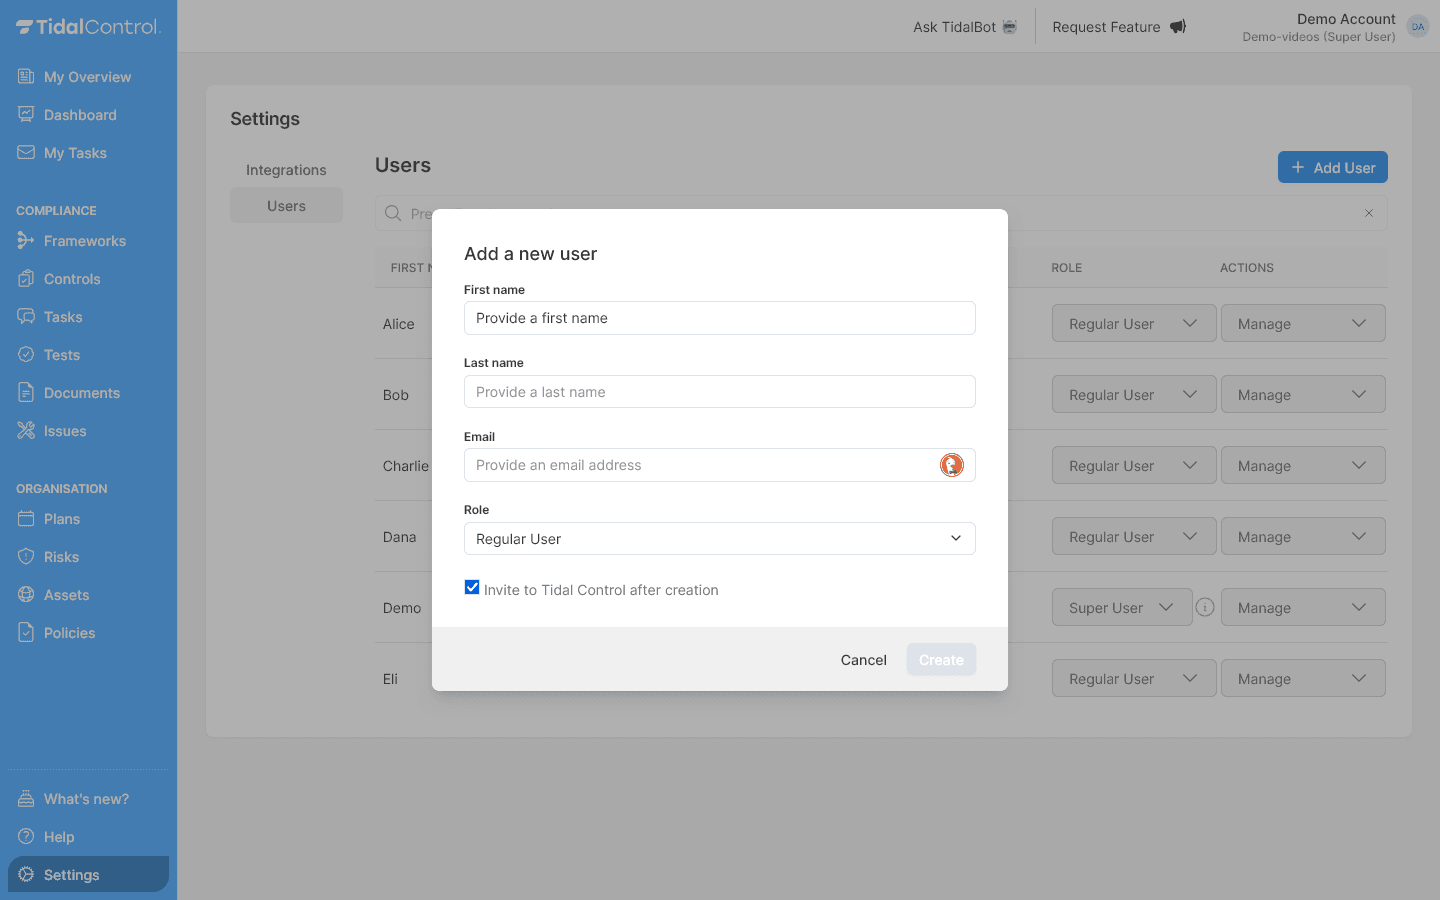
Filling in user information
Required fields:
| Field | Explanation |
|---|---|
| First Name | First name |
| Last name | Last name |
| Business email address | |
| Role |
|
| Invite to Tidal Control after creation | Send invitation email directly to user |
You can create users and assign them to compliance objects before inviting them. This allows you to set up the entire system in preparation for team onboarding.
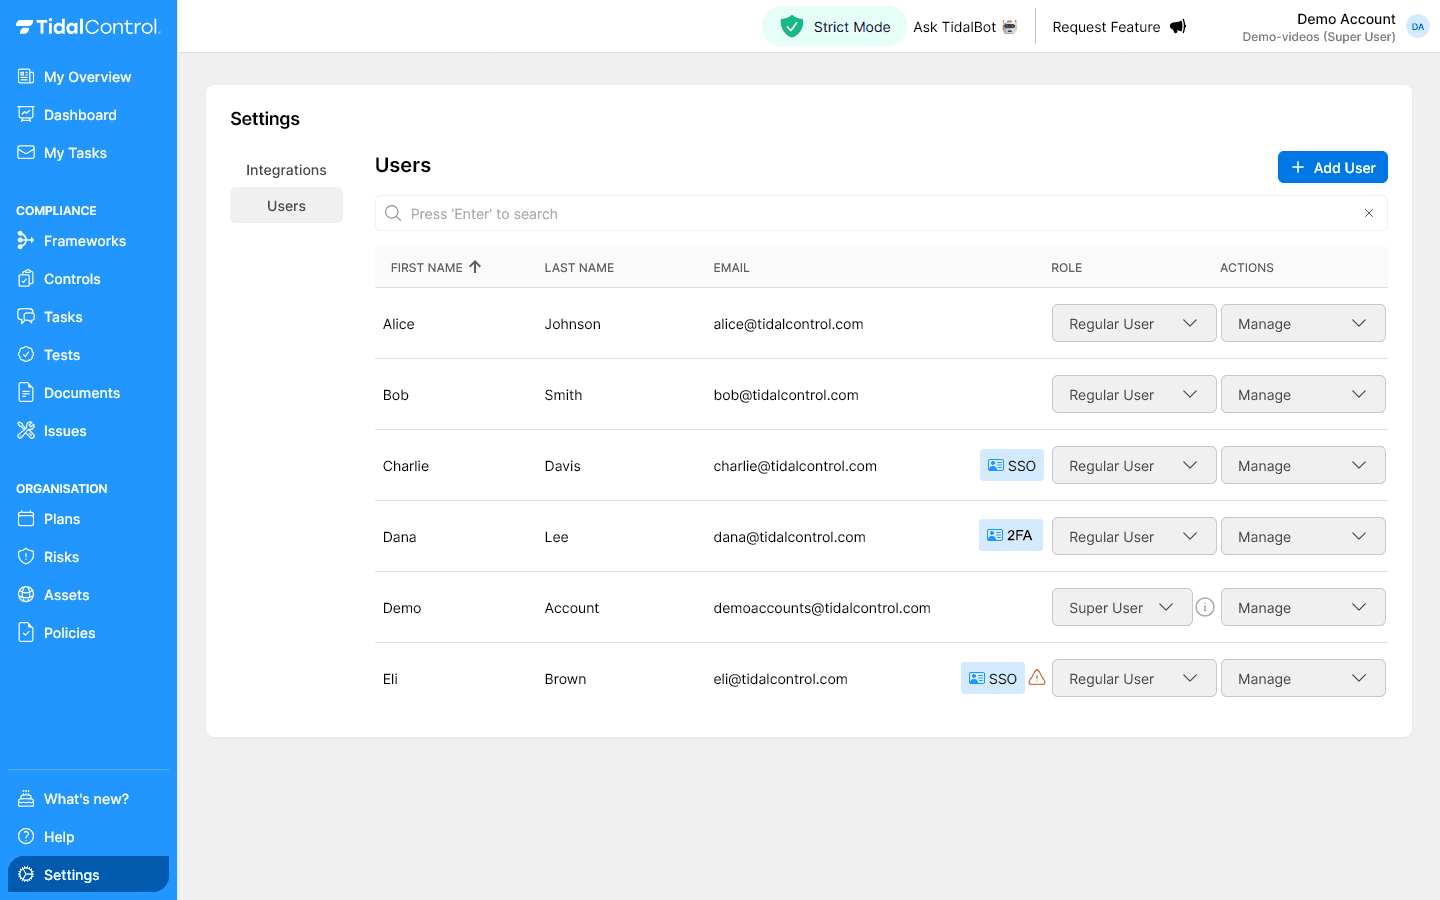
Assigning and changing roles
After creating users, you can easily adjust roles via the Role dropdown in the user table.
Role change process
- Go to the Users overview page
- Find the desired user in the table
- Click on Role dropdown in the user row
- Select new role from available options
- Change is saved immediately without confirmation
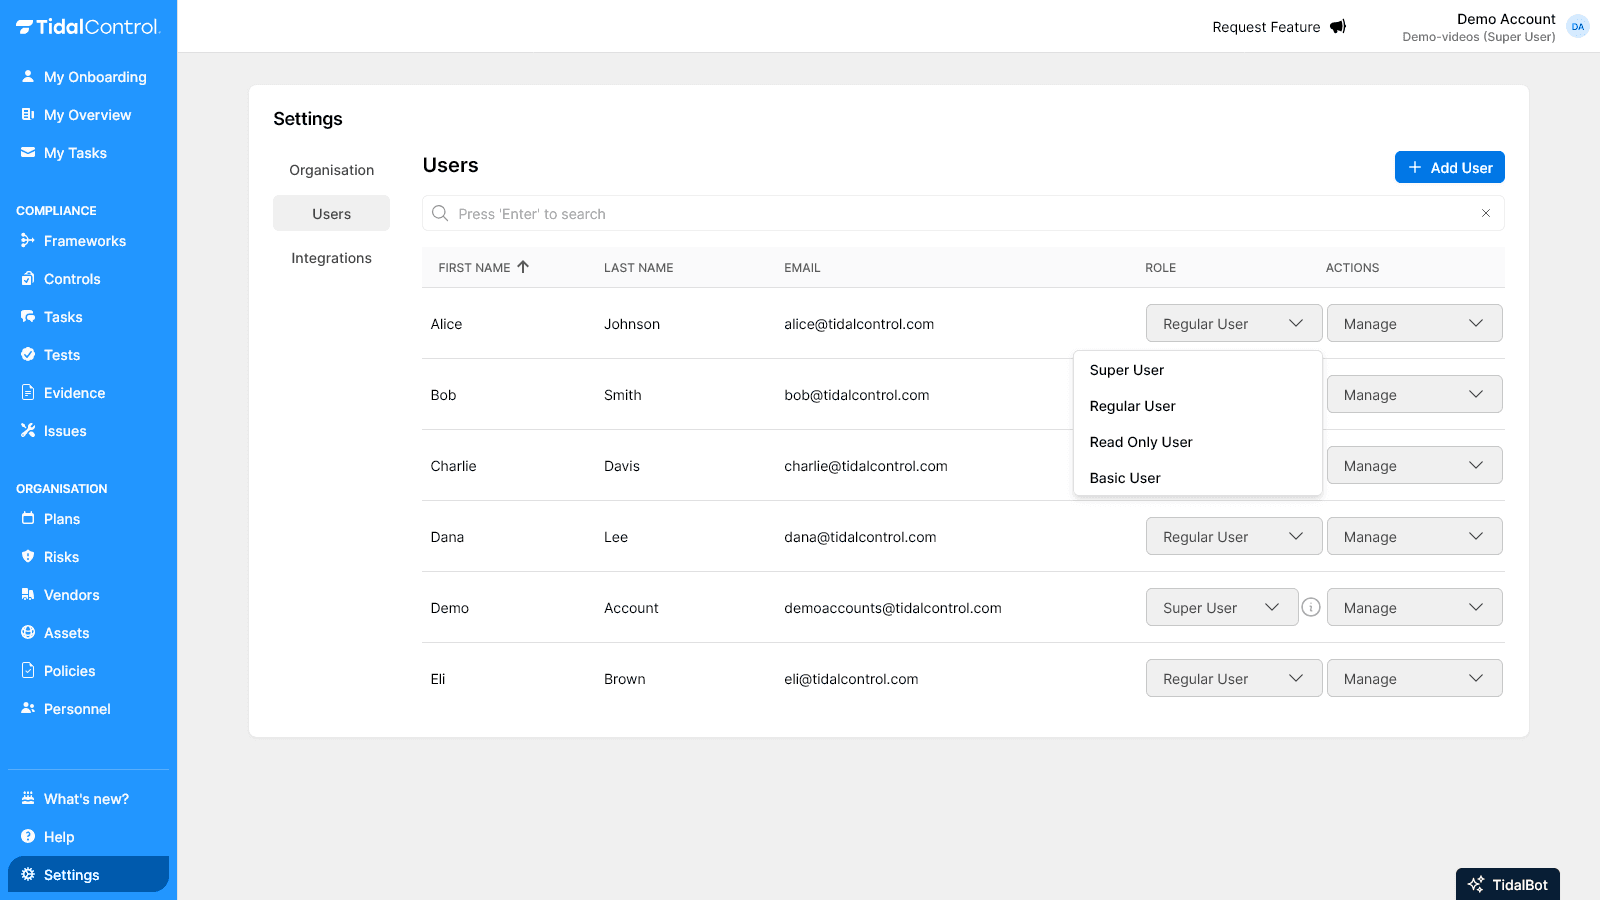
Security consideration: Granting Super User rights means full system access. Only assign this role to trusted administrators.
Inviting users
If you haven't invited users to Tidal when creating them, you need to do this later before login is possible. The invitation enables account activation and password setup.
Invitation process
- Go to Users overview page
- Find the new user in the table
- Click Actions menu (three vertical dots) in the user row
- Select "Send invite" from the dropdown menu
- Invitation is sent immediately to user email
What happens after invitation?
User receives email with:
- Welcome message with introduction to Tidal Control
- Password setup link via Keycloak interface
Invitations are valid for 7 days.
If the user hasn't activated their account within this period, a new invitation must be sent.
Invitation troubleshooting
Invitation not received:
- Check spam folder of user email
- Verify email address for typos in Users table
- Resend invitation via Actions menu
- Contact IT support for email delivery problems
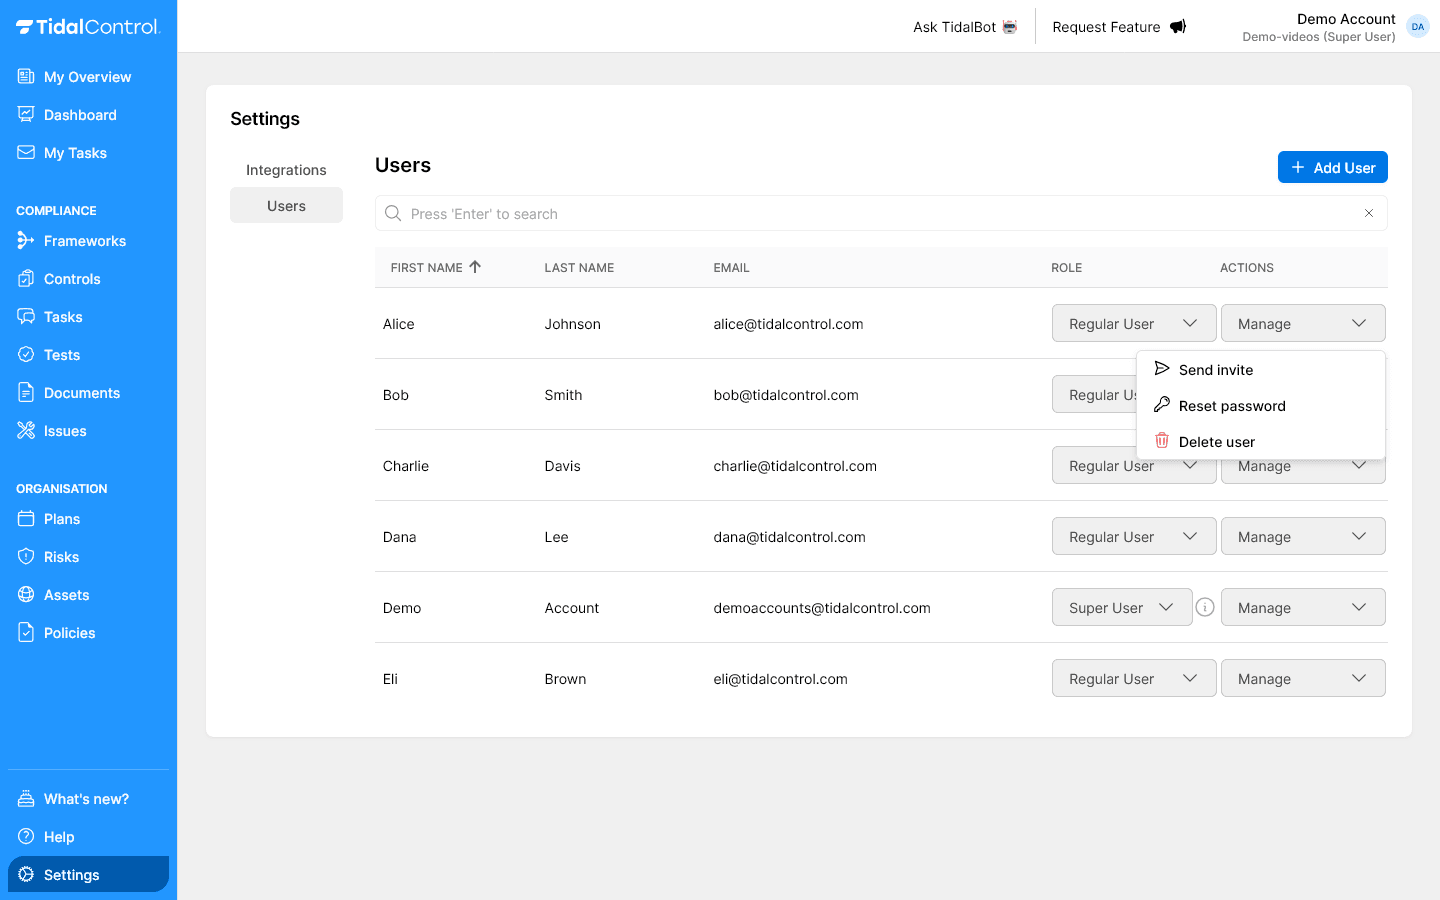
User management tasks
The Actions menu provides various management options for existing users, from password help to account deletion.
Resetting password
When to use:
- User forgot password
- Suspected password compromise
- New user didn't receive activation email
Reset process:
- Go to Users overview page
- Click Actions menu of relevant user
- Select "Reset password" from dropdown
- Confirm action in popup dialog
- User receives reset email with instructions
What the user receives:
- Password reset email with secure reset link
Deleting user
When to use:
- Employee left organization
- Account no longer needed
- Security reason requires access revocation
Deletion process:
- Go to Users overview page
- Click Actions menu of relevant user
- Select "Delete user" from dropdown
- Confirm deletion in warning dialog
- User is immediately removed from system
Impact of user deletion:
- Access blocked - Immediate logout and future login blocked
- Data preserved - Controls, tasks, evidence remain in system
- Ownership changed - Assignments show "Unknown user"
- Audit trail intact - Historical activities remain visible
Permanent action: User deletion cannot be undone. Consider first changing role to "Read Only User" for temporary access restriction.
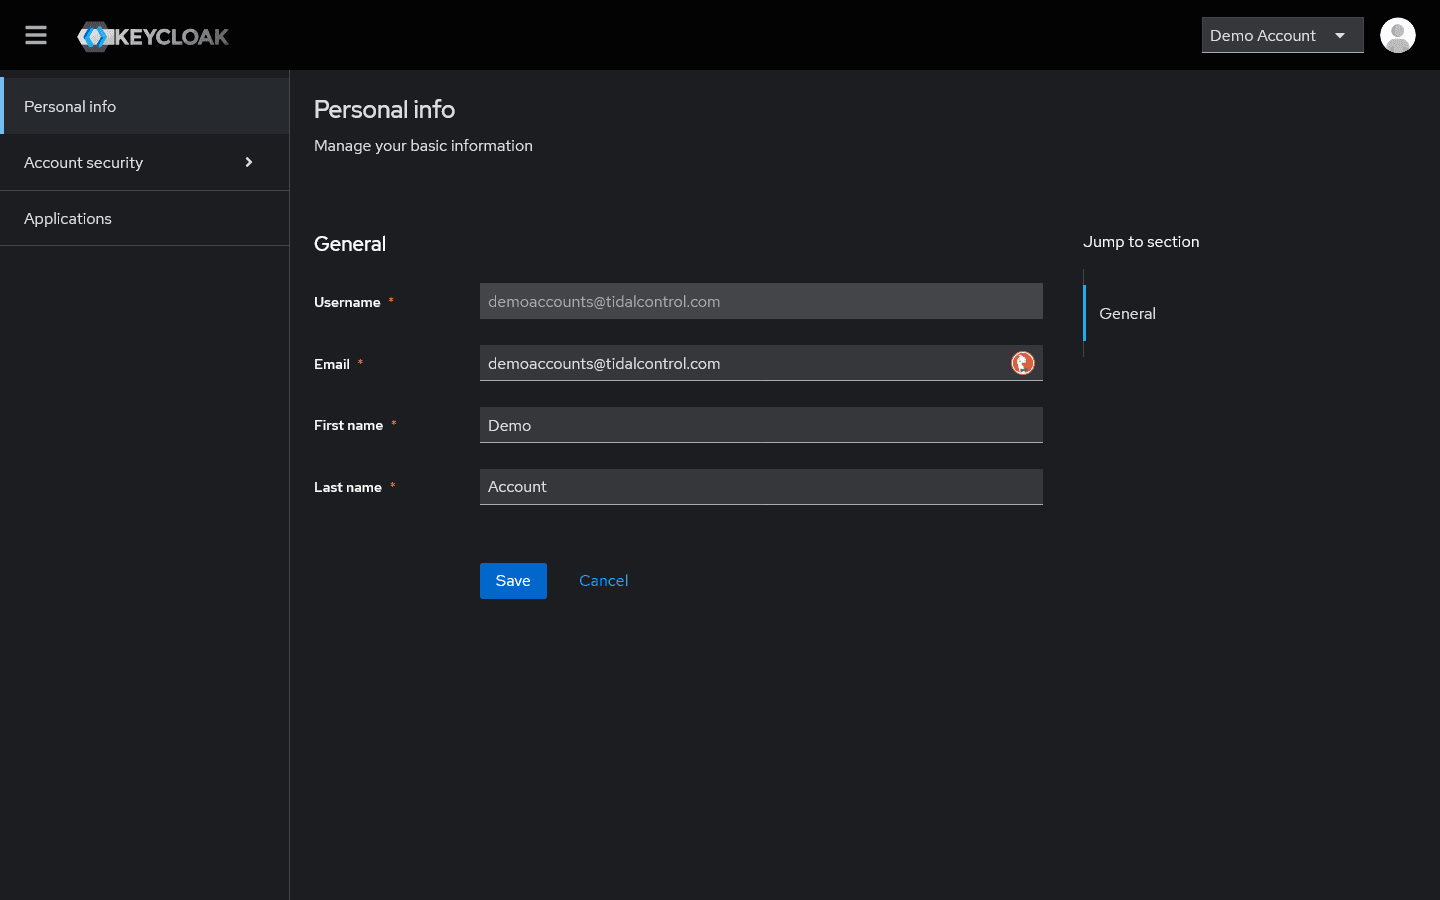
Keycloak profile configuration
Users can manage their personal account information via the integrated Keycloak interface accessible from their profile.
Updating personal information
Users can adjust themselves:
- Email - Contact address for system communication
- First name / Last name - Names as displayed in interface
Not adjustable:
- Username - Login identifier (often email address)
Access to Keycloak profile:
- Log in to Tidal Control
- Click profile icon top right (user avatar)
- Select "My Account" from dropdown menu
- Keycloak interface opens in new tab
- Adjust desired information and click "Save"
Configuring authentication options
Setting up two-factor authentication:
- Go to Account Security in Keycloak menu
- Select "Signing in" section
- Click "Set up Authenticator application" link
- Scan QR code with authenticator app (Google Authenticator, Authy)
- Enter verification code to activate 2FA
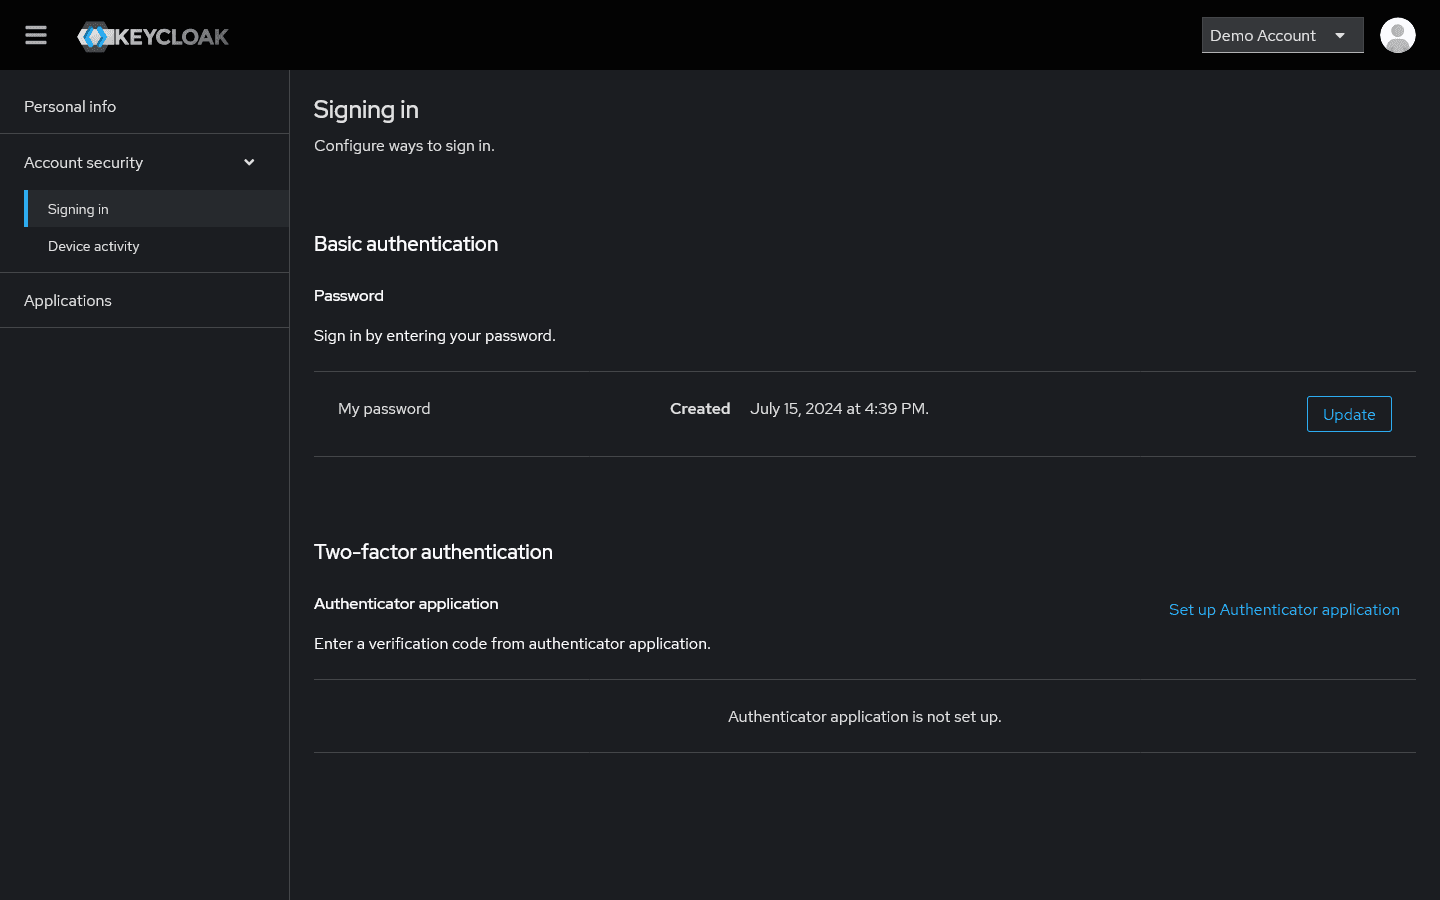
Available security options:
- Password management - Change password and strength control
- Two-factor authentication - Authenticator app configuration
- Device activity - Overview of active login sessions
- Applications - Linked services and access rights
Strict mode
Organizations using Tidal Control in Strict Mode have an additional layer of role-based access control per compliance object.
Is Strict Mode on?: You can see if your organization uses Strict Mode via the green "Strict Mode" indicator at the top right of the interface.
How Strict Mode works
Additional role assignment required:
- Regular Users start without access to specific controls or assets
- Object-level roles must be explicitly assigned per control/asset
- Owner role - Can create, modify and delete compliance objects (controls, risks, assets).
- Contributor role - Can contribute to tasks and upload evidence, and also create own tasks and issues.
Impact on user management:
- More granular control over what users can see
- Explicit assignment required for each compliance object
- Increased security but more administrative overhead
- Suitable for large organizations with strict access control
Send an email to support@tidalcontrol.com and we'll set it up for you. Additional license costs apply to using Strict Mode.
Bulk user management strategies
Group invitations
Efficient onboarding for teams:
- Create all users with correct roles
- Assign responsibilities to controls and assets
- Test configuration with one pilot user
- Send all invitations simultaneously for consistent process
- Organize onboarding session for simultaneous account activation
Practical tips for user management
New employee onboarding
Efficient onboarding checklist:
- ☐ Create user with correct name and email
- ☐ Assign appropriate role based on function
- ☐ Link responsibilities to controls/assets
- ☐ Send invitation and confirm receipt
- ☐ Guide first login and provide system explanation
- ☐ Support 2FA configuration if required
Employee departure handling
Safe offboarding procedure:
- ☐ Immediately revoke access via user deletion
- ☐ Transfer responsibilities to other team members
- ☐ Check ongoing tasks and change ownership
- ☐ Perform access audit for related systems
- ☐ Document in HR and compliance administration
Periodic user reviews
Monthly/quarterly checks:
- Identify inactive accounts and evaluate
- Check role appropriateness for function changes
- Monitor 2FA adoption and encourage
- Analyze access patterns for security risks
Next steps
Now that you can create and manage users:
- Start with pilot group for system configuration and testing
- Develop onboarding process for new team members
- Plan role management for future organizational changes
- Configure authentication policy for optimal security