Risks
Creating and editing risks
Adding new risks
Creating a risk
- Go to the Risks page via the main menu
- Click "Add Risk" in the top right of the overview
- The creation form opens where you can fill in risk information
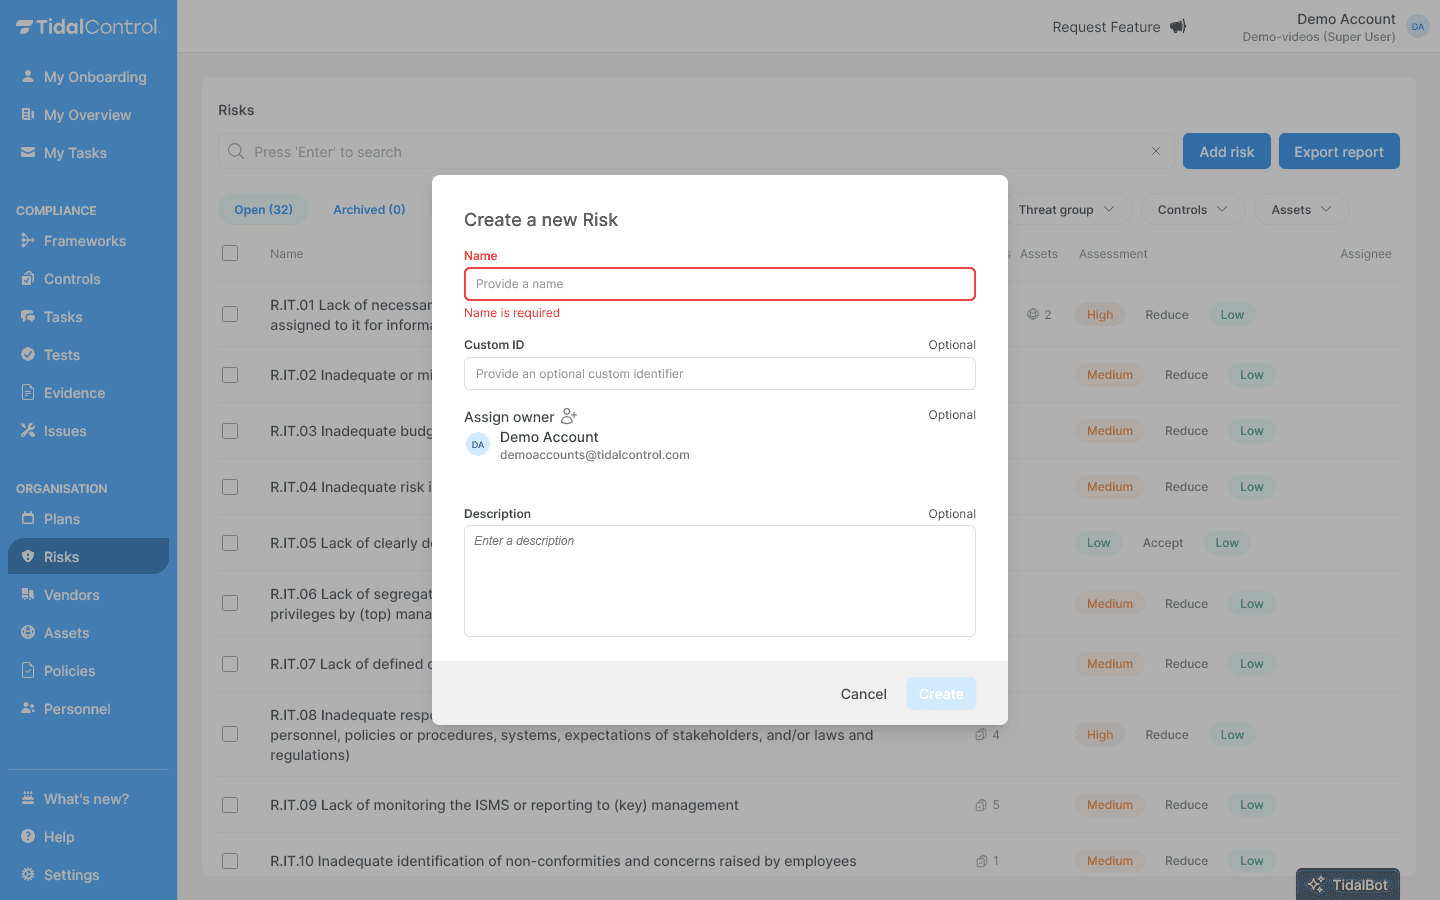
Filling in risk information
Required fields:
- Name - Choose a clear, descriptive name for the risk
- For example: "Malware installation on systems" or "Insufficient management involvement"
Optional fields:
- Custom ID - Your own reference number (e.g. "R.IT.01", "R.HR.03")
- Assign owner - Select the responsible person from the dropdown
- Description - Explain what this risk entails and why it's relevant
Clear naming: Use names that directly indicate what the risk involves. Avoid vague terms and focus on concrete threats to your organization.
Saving the risk
- Check all entered information
- Click "Create" to create the risk
- The new risk appears in your overview with initial status
Editing risk information
Opening risk details
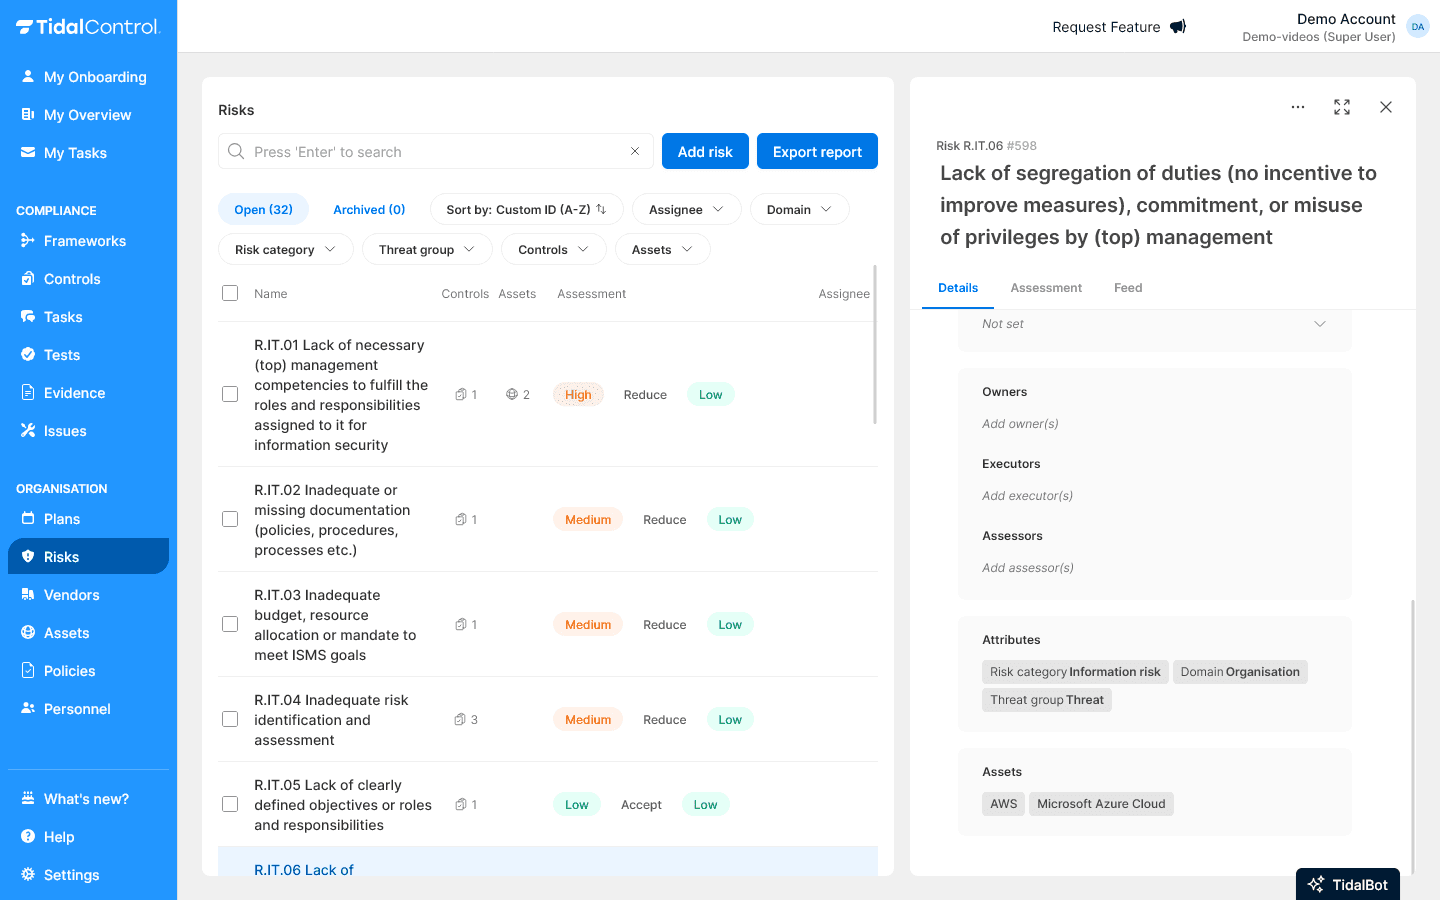
- Click on a risk name in the overview
- Select the "Details" tab in the risk interface
- All editable fields are displayed

Adjusting basic information
Editable fields in Details tab:
- Name - Adjust risk name
- Custom ID - Change for better reference
- Valid from / Valid to - Set validity period
- Risk Appetite - Determine acceptable risk levels
- Description - Extended risk description
How to edit information:
- Click in the relevant field
- Adjust the text or date
- Click the Update button on the left bottom or top right of the screen to save changes
Risk classification
Adding attributes:
- Scroll to "Attributes" section
- Click "Add attribute"
- Enter a title (e.g. "DOMAIN", "RISK CATEGORY")
- Enter a value (e.g. "Equipment", "Information risk")
- Attributes help with filtering and reporting
Examples of useful attributes:
- DOMAIN - IT, HR, Finance, Operations
- THREAT GROUP - Cyber, Physical, Personnel, External
- IMPACT TYPE - Financial, Reputation, Operational, Compliance
Consistent attributes: Reuse existing titles and values from the dropdown list to prevent typos and make filters effective.
Linking assets to risks
Why link assets?
By linking business assets, you establish which systems, data or processes are threatened by this risk.
Selecting assets
- Go to "Assets" tab of the risk
- View available assets in the list
- Select relevant assets by checking checkboxes
- Links are automatically saved
Selection criteria:
- Direct exposure - Asset is directly threatened by this risk
- Critical dependency - Asset is essential for business operations
- Data sensitivity - Asset contains confidential information
- Compliance impact - Asset falls under regulations
When conducting risk assessments, linked assets should be included in impact calculations. Therefore, only link assets that are actually affected by this specific risk.
Owners and responsibilities
Assigning risk owners
Setting Owners:
- Find "Owners" section on the right side of Details tab
- Click the user icon
- Type username and select from dropdown
- Multiple owners possible for shared responsibility
Assigning Executors:
- People who perform executive tasks for risk treatment
- Often operational staff or specialists
- (future feature) Automatically assigned to new manual tasks
Appointing Assessors:
- People who perform risk assessment tasks
- Usually risk managers or compliance officers
- Independent from implementation team
- (future feature) Automatically assigned to new risk assessment tasks
Owner vs Executor: Owners are ultimately responsible for risk management, Executors perform specific tasks. Ensure clear separation of responsibilities.
Managing risk lifecycle
Risk activation
Inactive risks currently have no impact on application functionality.
(future feature) In the future, risk assessments will only be scheduled for active risks.
A risk becomes "Active" when:
- The "Valid from" date is in the past
- The "Valid to" date is in the future (or empty)
- Controls are linked to the risk
Active risks:
- (future feature) Will be included in scheduled risk assessments
- Visible in dashboards and reports
Risk archiving
When to archive:
- Risk is no longer relevant
- Business activity causing the risk has stopped
- External circumstances make risk irrelevant
- Risk has been merged with another risk
Archiving process:
- Select one or multiple risks with checkboxes in overview
- Click "Archive" button at top of table
- Confirm archiving - risks disappear from daily overview
- Historical data remains available for audit
Effect of archiving:
- Risk appears in "Archived" tab
- All links remain preserved but hidden
- No new assessments or treatments
- Reports don't account for archived risks
Risk deletion
When to delete:
- Test risk with incorrect information
- Duplicate risk accidentally created
- Sensitive information that must not be retained
- Organization requires permanent deletion
Deletion process:
- Select risks with checkboxes
- Click "Delete" button at top of table
- Confirm permanent deletion - irreversible action
- All linked data is completely erased
Archive vs Delete: Use archiving for risks that are no longer relevant but have historical value. Only delete for technical errors or data privacy requirements.
Planning risk treatment
Linking treatment strategies
After risk assessment:
- Go to "Rating" tab of the risk
- Select or change treatment option (Reduce, Accept, Transfer, Avoid)
- For "Reduce" - Link relevant controls
- Add justification in comments field
Monitoring control effectiveness
Ongoing evaluation:
- Regularly check if linked controls are effective
- Update risk assessment when circumstances change
- Adjust treatment for new threats
- Changes are automatically documented in Feed tab
Bulk operations
Managing multiple risks simultaneously
Available bulk operations:
- Archive - Move multiple risks to archive
- Delete - Permanently delete selected risks
Bulk workflow:
- Select risks with checkboxes on left in overview
- Relevant buttons appear at top of table
- Choose desired action and confirm
Not possible for bulk:
- Edit risk descriptions
- Manage attributes
- Adjust asset links
- Report on selected risks
Risk reporting
Using export functionality
Generating risk report:
- Click "Export Report" in top right of overview
- Excel file is downloaded with:
- Risk names and IDs
- Inherent and residual risk scores
- Treatment status and linked controls
- Asset links
- Control effectiveness per linked Risk
Reporting applications:
- Management presentations about risk profile
- Audit documentation for compliance
- Trend analysis over time
- Benchmark comparison with previous periods
- Monitor impact of ineffective controls on current residual risks
Best practices for risk management
Risk identification
Systematic approach:
- Use templates for standard risks
- Involve different perspectives (IT, HR, Operations, Legal)
- Analyze historical incidents in your organization
- Monitor external threats in your sector
Risk naming
Clear conventions:
- Specific and measurable - "Data breaches through phishing" vs "Cyber risk"
- Organization relevant - Focus on actual threats
- Consistent structure - Use fixed format per category
- Avoid jargon - Understandable for all stakeholders
Regular reviews
Maintenance rhythm:
- Monthly check - Identify new risks (in very dynamic environments)
- Quarterly evaluation - Reassess existing risks
- Annual review - Examine complete risk portfolio
- Ad-hoc updates - After significant changes or incidents
Start small, build out: Assess all risks, but limit monitoring to the most critical risks for your organization. Gradually add more risks as your process matures.
Next steps
Now that you can create and manage risks:
- Perform systematic assessments for all identified risks
- Link effective controls to high risks
- Monitor treatment progress via dashboards
- Report regularly to management about risk profile
For operational guidance on assessments, see Conducting Risk Assessments.
- Previous
- Conducting Risk Assessments